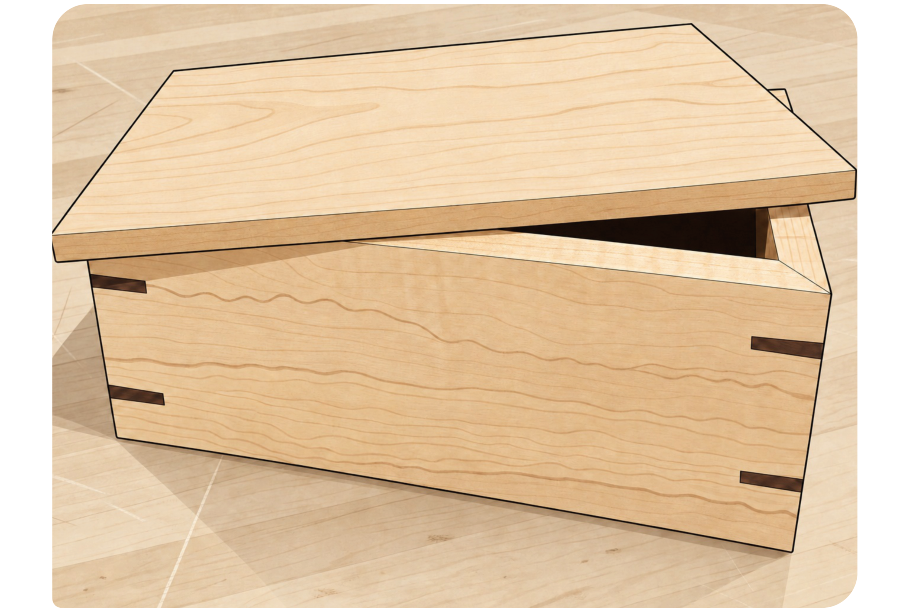
In less than an hour, you can build a solid wood keepsake box for yourself, or a gift for a loved one. No power tools needed. Simply glue, sand and finish. The natural variations in the wood make every box unique.
The Following Items Are Needed to Complete This Project:
Supply Item
Description/Specification
WOOD GLUE
Titebond® or Elmer’s® wood glue
SANDPAPER
150-, 220 and 320-grit
CARDBOARD
Approximately 2" x 4" to act as a sanding block
TAPE
¾" masking tape
PAPER TOWEL
Small pieces for glue clean up
FINISH
Nontoxic finish of your choice
WAX PAPER
Serves a a surface protectant
What’s Included:
A. 4 sides
B. 1 bottom
C. 1 lid
D. 8 small corner splines
E. 1 felt liner
STEP-BY-STEP ASSEMBLY INSTRUCTIONS
STEP 1 OF 11Remove tape from corner.
Your box arrives taped together, remove the light blue tape in order to lay the box flat, don’t remove the dark blue tape at this time. Lay the box flat on your work surface and proceed to step 2.
Remove only the light blue shipping tape.
STEP 2 OF 11Test-fit the box without glue.
With the miter edges facing up, fit the bottom piece into the grooves. Bring all four sides together and gently close the corners. Take it all apart after you understand how everything fits. This practice run will help make gluing easier.
Fit the parts together and get comfortable wrapping the box.
STEP 3 OF 11Smooth the inside surfaces.
Sand the inside surfaces and the bottom of the box with 320-grit paper (these have already been sanded to 220). Wrap sandpaper around a piece of cardboard to keep it flat. Sand in the direction of the grain. Wipe off the dust when you’re finished.
Sand the inside surfaces with the grain
STEP 4 OF 11Finish the inside.
Applying a finish to the inside before gluing makes it easier to remove glue squeeze-out later. Don‘t apply finish on the glue joints, in the angled spline cuts, or in the bottom grooves. Use the finish of your choice. We like Walrus Oil®, it‘s thick and resists running onto unwanted areas. Follow the manufacturer‘s instructions for application and disposal of rags.
Before you glue it up, finish the inside.
STEP 5 OF 11Glue the four corners.
Apply a thin bead of glue with a brush or your finger on the mitered joints. Then fold the sides together, open it again, and wipe off the excess glue. Apply glue to the end miters as well, keeping the glue off the inside of the box.
Start a thin bead. Continue along each miter. Spread an even layer.
Have strips of paper towels ready to wipe off excess glue. Use a new piece for each corner.
STEP 6 OF 11Fit the bottom & close the box.
Install the box bottom into the slot on one of the long sides, making sure it doesn‘t extend beyond the angled corner. Fit the other sides around the bottom, and check that the edge of the last corner is aligned. Tape the last corner together to clamp the assembly.
Start with two sides. Slide in the bottom. Wrap the side around the bottom. Tape the last corner together
STEP 7 OF 11Glue the splines.
Test the fit of each corner spline in its slot before gluing. If a spline is too tight, remove it, hold it down and sand lightly with 150-grit until it fits. If the spline is too loose, you can use masking tape to hold it down while the glue dries (the glue will expand the wood and hold it in place). Be sure each spline fits all the way to the bottom of the slot. The protruding edges of the splines will be sanded flush later. Set the box aside to dry.
Test fit each spline. Add glue to the long edge. Press fully into the slot. Close up of the spline in the slot.
No need to wipe glue, the tape protects the box from excess glue.
STEP 8 OF 11Sand and finish the lid.
While you wait for the glue to dry, smooth the inside groove of the box lid using sandpaper wrapped around a piece of cardboard.
Use 150-grit for the grooves under the lid. Once sanded move to 220-grit and sand the entire lid and round the edges to your liking. Finish with 320-grit.
Wipe off the dust, apply the finish of your choice, and set the lid aside to dry.
STEP 9 OF 11Sand the splines flush.
Once dry, carefully remove ALL the tape from around the box. To sand the splines flush, slide the sides of the box in long straight strokes on 150-grit paper taped to a flat tabletop. Be patient! Light strokes will help keep the sandpaper in place. When the splines are flush with the box, move on to 220-grit, and finally 320.
STEP 10 OF 11Flatten the edges.
Using 150-grit paper on a tabletop as you did for the splines, sand the top and bottom of the box until the mitered corners are flush, and repeat with 220 and 320.
Flatten the top and bottom. Sand all unfinished edges to 320 grit. Soften the edges to your desired shape.
STEP 11 OF 11Finish the box.
Clean off all dust and apply a finish to the outside of the box. Set it aside to dry. Now stand back and admire your work and the lovely wood grain!
Optional: When the finish has completely dried you can add the felt liner to the bottom of the inside of the box. It can be dry-fitted or double-stick taped.
Finish the box. Finish the lid. Let it dry fully.
IMPORTANT: For oil-based finish, an adult must follow the label for ventilation and safe cloth disposal.